

Matt and myself took it upon ourselves to do most of the citing, whilst Josh and Harry worked on the album cover or website. We used Photoshop to edit our publicity shots.
.jpg)
Below you can see an example of how we edited the promotional shot, particularly to adjust the colouring. The original photo is quite red/pink, and so we used the 'Color Balance' adjustment tool on photoshop to counteract this red with cyan and the pink with green. This was a common problem, and so with many of our photos we had to use this. We wanted the skin tones to seem more accurate to real life, and the background to be white as that is an industry standard.
 |
| Original Image Edited Image |
 |
| Original Image Edited Image |
We enhanced the images by firstly getting rid of the red hue, and having the white background actually white. We then made them more striking, with less washy colours, and more contrast - using a 'Contrast/ Brightness' adjustment tool, seen below in the selection of tools available on Photoshop to enhance images:

Certainly for the first image shown above, 'Auto Colour' was used initially to get rid of the red tones and balance the images colours, which we then could go on to perfect using the tools above, like 'Color Balance' and 'Brightness/Contrast'.
For the album cover, we needed to cut Roza out of the white background and onto a rose background, and we used the 'quick selection' tool to get Roza without the white background; but because of my unruly hair, we had to use the 'refine edge tool'. This would allow us go through specific parts of the cut out image, and redefine what is cut out and what isn't. This was useful as it then didn't look poorly cut out, with chunks of hair missing. We also used a feather effect when cutting Roza out, so that the cut out image had a more faded outline.
 |
| 'Refine edge' tool with 'feather' option on 'adjust edge' |
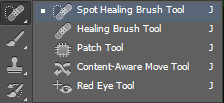 We also used a 'spot healing' tool to perfect any blemishes on the face. This was again, an industry standard that we needed to uphold. We also used the 'healing' tool, which takes patches from your desired area on the image, and clearly blends that on top of whatever you like. This was very useful in instances where my skin wasn't even and we needed to correct this.
 |
| 'Spot heal' tool |
To smoothen skin, we were able to use a 'Smoothen' action on Photoshop to create an air-brushed look for our publicity shots, again, an industry standard, especially within the R&B genre. The image below was one of our bed examples of the effect of this skin smoothening effect, and also one of the photos I spent the most time editing, as it was a good shot, just very poorly lit etc:

I had to turn the brightness and contrast up, and use the selection tool to select my face, as it was the darkest point on the photo. I needed to separate my face from the rest of the image as I couldn't adjust the brightness any more without over-exposing the rest of the image. Therefore, once selected, I could brighten the face further, without over-brightening the rest. I also could adjust the colouring further, without making the rest of the image too blue/green. Once I got the image to a better standard I could then smoothen all of the skin.
No comments:
Post a Comment